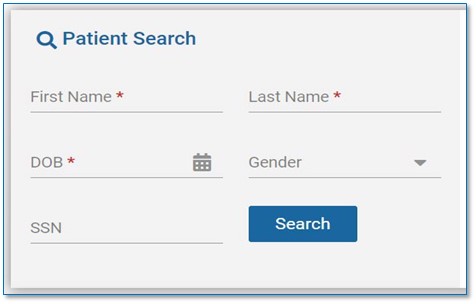
Patient Search
Users can search for patients directly from the CRISP Portal home screen. Users must enter a first name, last name, and date of birth to render search results. Gender and Social Security Number fields can be added to narrow the selection. Data entered is not case-sensitive, and dates do not need forward slashes separating the month data and year. Entering 050281 will result in 05/02/1981.
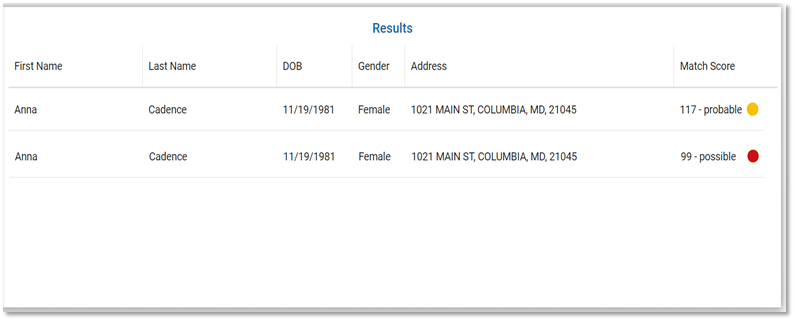
The results of the Patient Search will appear in order of most likely to least likely matches. Each result will contain a match score and match grade. Only patients matched using the required fields plus gender and social security number (SSN) will display as ‘Certain’. The possible grades include:
- Certain (Green Icon)
- Probable (Yellow Icon)
- Possible (Red Icon)
Launching Applications
Within the Portal, there are applications which require a patient search and other application that do not. Before making a patient search, the applications which do not require patient context will display within Your Dashboard. Users can launch these by clicking on the desired application’s blue box or tile.

Applications requiring patient context will not appear in Your Dashboard until a patient search is conducted.
Once a Patient Search is completed, users can launch their selected patient’s data within an application by either:
- Click on the Patient record within the search results table. This action will cause a Selection App pop-up to appear. User can click the four-box icon next to the application name to launch that application.
- Once a patient search is completed and a patient record as been selected, applications that require a patient search will now appear within Your Dashboard. Users can launch these by clicking on the desired application’s blue box or tile.
All applications will display within the eye frame of the Portal as shown below. Users can navigate to another application by clicking the application title in the side tool bar. User can collapse the application side menu by clicking on the arrow next to Reports & Applications. The Home button at the top will navigate the page back to the Portal home screen.

Patient Attestation
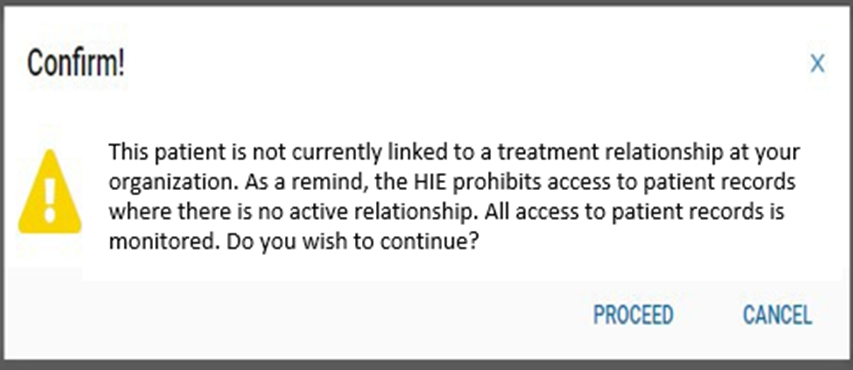
Users who attempt to launch an application for a patient whom they do not have an active treatment relationship for, (i.e. are not currently active on their organization’s Encounter Notification Service (ENS) Panel) will be presented with the following warning message. The user can choose to select Cancel, which will navigate the page back to the home screen. If the user selects Proceed, they will be asked to enter a reason for attesting to the relationship. Also, please be aware that all these requests are recorded and audited.